Wednesday, October 6, 2010

Shabby Chic Message Center: $5

I was perusing Young House Love the other day, when I found THIS:

make-these-chalk-AT


Adorable kitchen message center.  Ironically, I found this

in our second garage the other day and have been dying to make something awesome out of it.  It was a match made in heaven, except one of the panes was broken beyond repair.  Luckily, I also found a rusty old screen in the garage (no, I'm not kidding).  First, I donned my paisley women's-sized leather work gloves and got rid of the broken glass. 


Aren't they adorable?

Then I cut out that screen, sprayed it with some black rustoleum and took out my handy staple gun.  I started taping off the woodwork & called nick to stop at home depot for chalkboard spray paint.  It cost a grand total of $5.  3 coats of spray paint, 24 hours drying, lightly coating it all with chalk & wiping & some innovative hubby hanging and:

Voila!

Grocery lists, key hooks & a cool conversation piece.  It'll prolly llook a lil' better once we finally paint the kitchen.  All things in their own time, my friends. 

Monday, October 4, 2010

My Poor Poplar Tree

We have an enormous poplar on the edge of our property. 

I've always been quite fond of it.  It's the only sizeable non-pine tree on our property and I always thought it was a cool shape.  Unfortunately, it has also always worried me.  I was just waiting for a big branch to fall off it (and probably crush my garage) during that big storm last winter.  See, it has what I thought was a rot of some sort, but my arborist assures me is some sort of "scar" from a past trauma in it's life.  Needless to say, this bad spot was supporting quite a bit of weight. 

But my tree survived our horrendous winter AND a wind storm that knocked our power out for the better part of a week... THEN this happened:


My neighbor's landlord had her son-in-law remove some trees that did not fare so well in that summertime wind storm, and tree #3 fell the wrong way.  This reminded me both of the power of a falling tree and the importance of having a professional handle bigger trees that are near any structure.  It was risky to cut a tree that close to a house, period, but one that tall without climbing equipment? Nuts. 

This terrible misfortune, that was very hard on the people who used to occupy that house, did at least teach my neighborhood a lesson.  There have been trees and severely damaged buildings going down all over the place.  I called Harry, good family friend & tree guy, out here last week to look at my sickly poplar.  He was up in the air as to whether or not we could just top it or it would need to come down.  This morning though, we discovered that the mid-sized branches were snapping like dead twigs.  That is the sign of an unhealthy tree. 


Click Here for Video:

Wednesday, September 29, 2010

Fall and a Mosaic

By most counts, fall is my favorite season.  The weather is much more bearable, Western PA is absolutely beautiful and it's the appropriate season to break out some of my favorite foods and scents and decor items.  Unfortunately it is also my peak allergy season and the days get steadily shorter.  It's only been a few weeks and already I miss late dinners and later dog walks, eating on the porch and being able to cut the entire yard in one evening.  It's not easy settling into a new routine, but we're working on it.  Yesterday I remembered to eat early so Sadie and I could walk after dinner.  Tonight I forgot.  Poor puppy needs exercise if she's gonna be bearable inside, which she will be so much moreso in the coming months. 

To keep my mind off of both unemployment and the darkness, I decided to finally put up the mock mosaic on the "Fireplace" in the living room.  I use the quotes because it's actually a piece of furniture that burns cans of gelatinized rubbing alcohol.  It sounds silly, but it looks real and is an integral part of my big Victorian plans for our living room (which may take a while to carry out).

The first thing I did was lay it down on it's side (though I'm pretty sure this will work on something upright as well) and pick through my pieces of broken plates.  The great thing about mosaic is you can use anything you want!  Then, I laid them out in the order I wanted them. 


I decided to stick them down with hot glue, but if you decided to try this, make sure to take into account the materials of your tiles and surface when choosing an adhesive. 

Then I put joint compound in an icing bag to use as my cement. 


Then I piped joint compound into ALL the cracks, and smoothed it out. 

As it dried, I noticed cracks starting to form from shrinking compound.  I think I'm going to let it dry for a full week before filling in the cracks.  Technically, once it's dry you should coat it in polyurethane or some other clear coat.  I don't think I'm going to do that unless I have to because it tends to yellow and there's an awful lot of white. 

Cost of Project: $0 I had everything I needed just lying around.  I think I'm going to paint the fireplace eventually, but I made sure to clean the wood up of joint compound in case I change my mind.

Friday, September 24, 2010

Grilled Pizza

Friday is pizza night here at the Starosta household.  We love pizza.  I have one dough recipe that I modify as i feel, but here is the basic:

1 c. Room temperature flat beer (different beers, different flavors or wine or chicken broth or milk or water)
2 tbsp. sugar (or honey or agave)
2 tbsp. Olive Oil (or canola or melted butter)
1 tsp. Salt
2 1/2 c. Flour (White or Wheat or White Whole Wheat, and sometimes I substitute a cup of cornmeal)
2 1/4 tsp. Bread Machine Yeast

It's very flexible.  Tonight was water, agave, Olive Oil, White Whole Wheat & Cornmeal.  I had onions, Nick had pepperoni (yuck!) 

In an effort to change pizza night up a bit, I decided to make personal pizzas (as opposed to one big pie) and grill 'em!

Step 1: Roll out dough.  This is one instance that does not make allowances for sticky dough, so roll it in more flour baby!


Step 2: Spray lightly on BOTH sides (you don't want to be spraying at the grill once its on) and toss it on!  Close lid. 


Step 3: Flip When underside has nice grill lines and is sufficiently cooked enough to flip. 

Step 4: Top immediately after flipping.  The second side of the crust will not require as much time to bake and you want your cheese melted and any toppings cooked.  (I learned that the hard way, my onions were a lil raw.) Sorry about the overexposure, it was sunny out.  (And windy, I was having trouble keeping the grill lit)

Step 5: Remove from the grill & Enjoy!

Making a More Efficient Toilet

Here in the Starosta household, we have a lovely, ancient, throne.  It is by no means an efficient flusher, but it has served us well and a new commode would run at least $100.  This morning, I went on a mission to conserve water and our Water & sewage bills. 

Step #1: Overcoming my fear of the toilet tank. 


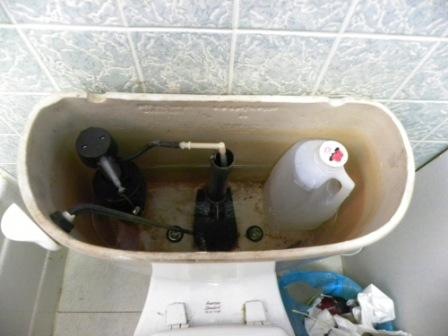
Isn't it gross? Of course, it's gross from a build up of minerals from SWPA's lovely hard water and nothing more.  Grit my teeth and carry on. 

Step #2: Get an idea of how much water it is currently using. 

As I Understand it, there is no good (free) way to do this.  Instead, to measure my improvements, I will time how long each flush takes.  From the moment I pull the handle until the water stops running is 1 min. 28 sec.

Step #3: Adjust the Spring Clip on the Refill Valve

spingclip


At the very left of the tank is an arm with a wire on it.  On that arm is a clip.  The farther down on the wire that clip is, the less water will enter the tank at each refill.  Mine didn't go easily, but it did go down. 


Note the difference in the water lines?  It went from a flush time of 1:28 to a fill time of 1:07, a 24% decrease. 

Step #3: Take up the Space:

I was reading about a week ago about putting a jar of rocks in the tank to take up room and making it think its fuller than it is.  Then, when researching more closely I read about putting a half gallon full of water in the tank.  It is bigger and no glass to worry about. 

It looked like it might have enough room to hold a gallon, but I tried and it was just a tad too big.  I'm gonna keep looking for something bigger, but in the mean time, this will do.  New Flush time: 57 seconds, 64% of the old time. 

Mission: Accomplished.  Happy flushing!

For more suggestions, look here. 

Tuesday, September 21, 2010

Getting Rid of Bathroom Scuz

I don't care for cleaning the bathroom.  Even more so, I don't like to clean the bathtub.  I usually let Nick have that honor.  But, try as he might, cleaning isn't exactly his strongsuit.  Between that and the scuzzy (and slippy) film left on the floor of the tub by my homemade soap, the tub was in bad shape and I've kept "meaning" to clean it.  This morning I discovered the beginning of red mold.  There was no more delaying it, it had to be done.  I have no idea if I'd read it somewhere or if it just came from my head but I decided to make a paste (for lack of a better word) of vinegar and salt.  The mold was no problem.  The scuz still took quite a bit of elbow grease, but the stuff really worked.  I don't know if the salt just acted as a scrubbing agent or if there was something chemical going on,  it did feel like I was inhaling some funny vinegar fumes.  Moral of the story: Clean tub, Green methods, Happy girl. 

Monday, September 20, 2010

Past Projects: The Master Bedroom

This is my house:

IMG_0023

Say "Hello, House!"

I thought I should introduce you.  I'm going to be sharing with you what we did and are doing to it.  Mostly because I'm quite obsessed with it's remodel. 

This is what the master bedroom looked like shortly after we moved in.  Pardon the mattress on the floor, I was staging a protest. 

IMG_0019

IMG_0020

And, on the wall opposite the bed, paneling! (which was apparently was so horrifying I never took a picture) With only one closet, barely big enough to house my clothes.  Luckily for Nick's homeless clothes, it's twin occupied the same wall space but opened to the kitchen.   Yes, his clothes lived in the kitchen.  And he changed in the kitchen.  And left clothes all over the kitchen. 

Obviously, this clothing situation just could not be, so we decided to tear down a wall! (or rather I did, Nick didn't see why his clothes couldn't live happily ever after in the kitchen) Here was the Plan(not necessarily to scale):

Bedroom Remodel

So, we removed the ugly paneling.

IMG00019

IMG00018

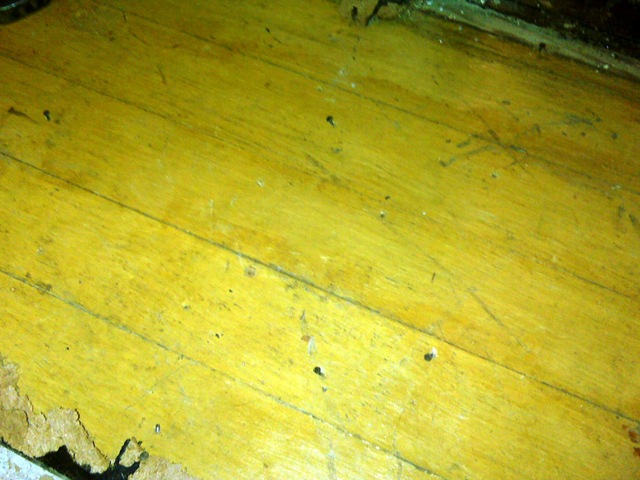
But of course, the floor in Nick's closet was tile and mine was carpet & that just wasn't gonna jive with the new floor plan, so we started ripping up floors.  The plan was to only remove the flooring in the closet area and we'd deal with what we found.  Worst come to worst, we'd put in those sticker tiles.  Well, there was tile under the carpet, but under the tile was...WOOD FLOORS!

IMG00045

So we removed all of the flooring in the bedroom, then in most of the first floor and did a 4 MONTH detour into flooring. 

IMG00047

IMG00053

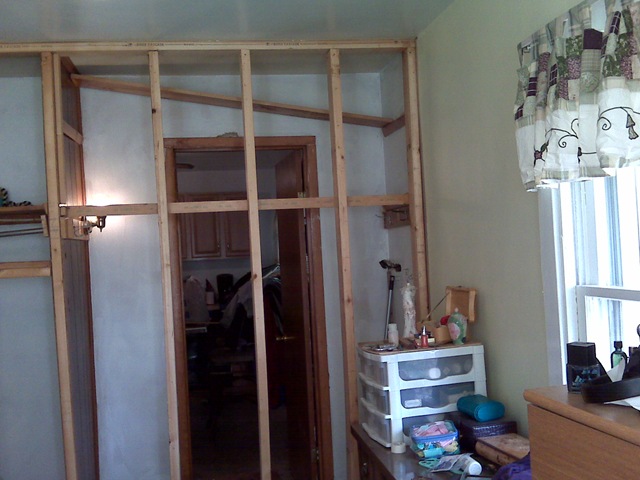
The bedroom was by far the most distressed and took the longest before we gave up on the sanding and we were a little worse for the wear, but we finished it shortly after Christmas (the rest of the floors were finished in November)  Then it was time to remove the plaster from the kitchen wall, rearrange the studs and put back the studs in the bedroom, which we took out for ease of closet-floor sanding. 

DSCN0262

This was the point where Sadie decided we were nuts. 

But the walls were cleared

DSCN0288

And new framing was erected

And incase you wondered what we did when the Good Lord saw fit to dump 3 ft of Snow on Pennsylvania in the course of 24 hours,

DSCN0380

We were hanging drywall! Of course!

But then we had scuffed floor boards in some spots and naked ones in others and no shoe molding anywhere.  We also had bare drywall in some spots and translucent, poorly done yellow paint in others, so we painted!  I chose Egret White for the trim (you'll hear that name a lot because I am standardizing the whites in my house to egret) and haven green, both sherwin williams paints because my uncle lets me use his business account there.  The paint itself was Duration Home, which is Green stamped, extremely low VOC and 100% scrubbable!  Oh, and Nick's parents brought in the dresser from his bedroom at their house to complete the look and his mom made us new curtains (same pattern & liner as the livingroom so it looks uniform from the street but different fabric) and roman blinds. 

When this pic was taken, the one curtain was out for alterations, but they all match now. 

DSCN0499

His and Hers Closets! AND, I don't have any pics of the process, but that full length mirror is actually a heavy beveled number (with a crack in the corner) that my parents have had my entire life, and I'm not even sure how I wound up with it.  When we put up the studs for the closet, we placed them about the size of the mirror.  I bought regular crown Moulding & ripped divets for the edge of the mirror with the table saw and the frame is actually nailed into the wall, the mirror is permanent. 

DSCN0502

The poor wall above the bed is still naked.  I'm thinking antique stained glass, or maybe i'll make my own stained glass, but i'm not sure yet. 

Oh, and while I may have given up closet space in the deal, I actually GAINED storage capacity, thanks to my closet organizer.  Nick opted for a bar and a shelf. 

P.S. The green looks better in the daylight then with the icky CFL bulbs in the pics, but such is life.