Pages

Tuesday, July 27, 2010

Crock Pot Hot Process Soap – LOTS of pics!

I'm so excited to share this with you!

I knew people made their own soap long ago and there were some people crazy enough to still do it, but i never considered it a reasonable thing to do... UNTIL I read that it could be done in a Crock Pot...fix it and forget it right?

First thing you have to do if you want to make soap is find a recipe, in this instance, a hot process recipe.  There are a TON of them online, but make sure you run them all through a lye calculator.  I started out with a recipe of 80% Olive Oil and 20% Coconut Oil, plugged everything into my lye calculator and it gave me all of my exact measurements.  The lye was very hard for me to locate, but Lowe's sells it (Roebic Crystal Drain Cleaner, labeled as 100% lye, NaOH) in their plumbing section (not the cleaner section). 

METHOD

1. Turn Your Crock Pot on to low
2. Using a scale (not liquid measures), measure your oils and put in the crock pot.  

3. While the oils are warming/liquefying (if solid at room temp), weigh the water and lye.  USE GLOVES, and goggles or a mask if so inclined, when handling lye.  It is highly caustic and can cause chemical burns.  Lye also reacts with aluminum, so keep it away from it, and be very cautious about cleaning procedures for any kitchen item that comes in contact with it. 
4.  Combine water and lye in a heat proof glass container, adding the lye to the water.  If you add the water to the lye, there will be a very unpleasant volcano. Stir until the lye is completely dissolved.   This part gives off some pretty strong fumes, be careful!

5. Dump water/lye solution into the pot (still set on low with oil in it) and use an immersion/stick blender to mix it very well until it's nice and thick and even. 

6. Cover and wait for 30 minutes. 
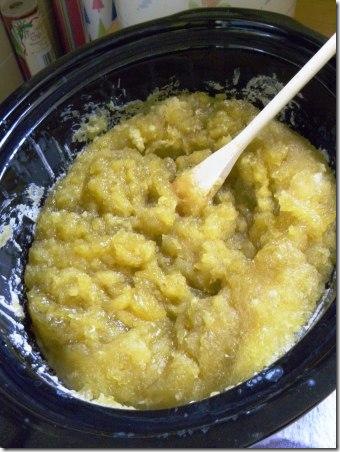
7. After 30 minutes, start checking it and stay nearby, it should just be starting to get thick around the edges, but still noticeably creamy in the middle.  (this pic is from 35 min, the disruption in the middle creaminess is cuz I couldn't help prodding)

8. By about 45 minutes, the island of creaminess should be completely gone. 

9. When it is gone, remove the crock (or if you're kickin' it old school, just turn the pot off)  and stir, checking for any missed creaminess (return to heat if you find some).  My instructions recommended that you rub a pinch of soap between your fingers until cool then touch it to your tongue.  If it needs to cook longer, it will feel like a 9v battery on your tongue.  I couldn't tell if it stung like soap in my mouth or a 9v battery. 

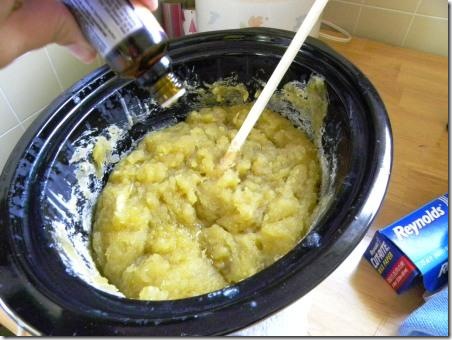
10.  Now is the time to add any scents or colors.  I added grapefruit essential oil, and I had hoped to color a portion and swirl it back in.  Unfortunately, contrary to what I read on the net, the soap wasn't warm enough to melt my crayon shavings, so i wound up with crayon confetti in my soap (making it unfit for use in laundry soap, heaven forbid that crayon confetti wind up on the dryer). 

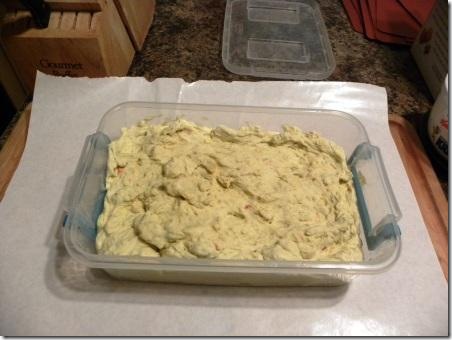
11. Place in relatively heat-proof mould and cover.

12.  The soap will stay warm for much longer than you'd thing (it's a chemical thing and part of the process).  It's ready when it is cool and solid to the touch.  Mine was ready overnight, but I'm told that's not always the case. 

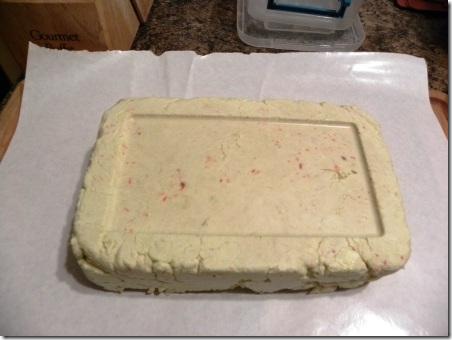
13.  As the soap will continue to get harder for a week or two, cutting the soap immediately upon unmoulding is best. 

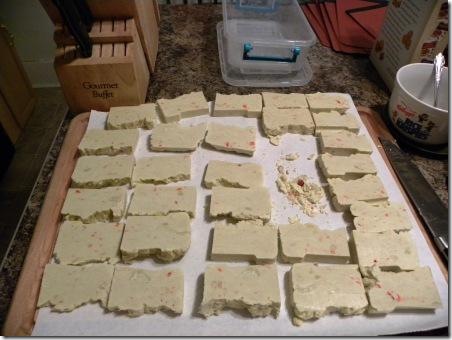
14.  It is ready to use at this point, but will continue to harden for about another week.  When it is harder, it should lather a little better.  Any little chunks can be kept and used for something more productive, or pitched.  I chose to wrap mine individually in butcher's paper (wax/plastic side on the inside) but you can also put any kind of paper in the middle to store.  If the soap ever irritates your skin, stop using as it may be a sign that the lye wasn't all processed.  Your homemade soap won't probably be as bubbly/lathery as bought soap, but suds don't actually clean. 

HAPPY SOAPING!

Sunday, July 25, 2010

My Weekend, the FAIL Blog

Well, I had a handful of things I thought could be cool to tell ya'll about this weekend, and they all either flopped or were completely unremarkable.  As such, I was compelled not to share, but we learn from failure, so watch me fail! 

CUCUMBER MELON?

Apparently when left on the vine too long, cucumbers turn orange and resemble a small watermelon. 

QUILT PATCH

If there's one thing I stink at most seriously, it's sewing.  (Thank the Good Lord for my Mother-In-Law for the important things.) 

Less than a week before vacay, my little angel chewed a hole in the quilt in the master bedroom, which we just redecorated around the basic color scheme of that quilt.  I take some of the responsibility for the mishap, because I broke my strict "I'm higher on the food chain, therefore I get to go on the furniture and you don't" rule. 

Luckily, when we registered for the bedroom set, we also bought a matching valance which we no longer use.  I had hoped to make it look like there was never a hole at all, but one of the two fabrics she chewed through wasn't featured on the valance, so big ugly patch it is. 

LIQUID CASTILE SOAP

In anticipation of making regular bar soap later this week, and because its useful stuff, I thought I'd give it a try.  Silly me though, picked the recipe that looked the easiest instead of the one with good reviews.  I wound up with what looked like the fat floating on top of refrigerated chicken broth. 

FWIW, the floating globs are soap, which left my hands nice and silky. 

ZUCCHINI GAZPACHO

Let's just say i don't recommend it. 

Wednesday, July 21, 2010

The Zucchini Diaries: pt. 3

Sorry folks, long time no post.  Busy yet enjoyable vacay followed by a hectic VBS week, which may kill me yet, will do that to you.  On to zucchini: Everyone's favorite veggie. 

ZUCCHINI LASAGNA

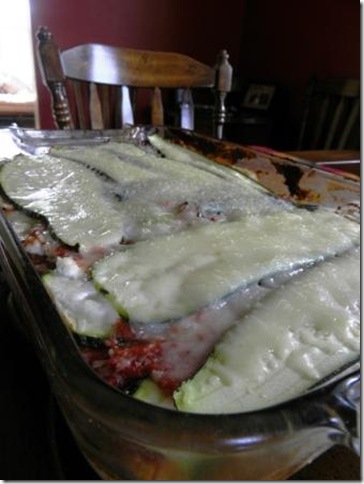
This idea has always intrigued me, and it has always disappointed.  Mostly because I wound up with soup.  The concept is simple: Replace the noodles in lasagna with zucchini planks.  However, zucchini being what it is, it leeches water into an already moist dish.  Here is my solution(which i just finally got to try out today):

1. Plank 2 or 3 zucchini and set aside
2. Mix 3 small cans of tomato paste with Italian Seasonings & minced garlic (or your garlicfying item of choice)
3. Mix a big tub of ricotta with 1/2 a container of dried grated Romano
4. Start layering a 9x13 starting with tomato paste mix, then zucchini, then cheese mix.  Don't forget the potency of tomato paste, so while you will use about the same amount of zucchini (noodle) and cheese mix as you would in a regular lasagna, you will use less tomato paste. 
5. Finish off with zucchini and top with soft Italian cheese of choice (mozzarella?)
6.  Bake at 425 until it's finished (sorry, i know that's descriptive)

ZUCCHINI PANCAKES

Just like potato pancakes or latkes, only zucchini instead of potatoes.  Mine include Shredded Zucchini, Shredded onion, an egg, flour until apropriate consistency, bake or fry and salt to taste. 

ZUCCHINI QUICHE APPETIZER TRIANGLES

r36603fp

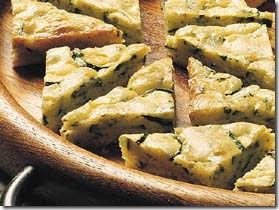
This one is straight from Betty Crocker herself, and I LOVE it!  It makes a great addition to a brunch or lunch, or can be served as an appetizer or hors d'oeuvre.  It is equally delicious tepid, cold or warm. 

3 cups thinly sliced unpeeled zucchini (4 small)
1 cup Original Bisquick® mix
1/2 cup finely chopped onion
1/2 cup grated Parmesan cheese
2 tablespoons chopped fresh parsley
1/2 teaspoon salt
1/2 teaspoon seasoned salt
1/2 teaspoon dried marjoram or oregano leaves
1/8 teaspoon pepper
1 garlic clove, finely chopped
1/2 cup vegetable oil
4 eggs, slightly beaten

1.Heat oven to 350ºF. Grease bottom and sides of rectangular pan, 13x9x2 inches.
2.Stir together all ingredients. Spread in pan.
3.Bake about 25 minutes or until golden brown. Cut into 2-inch squares; cut squares diagonally in half into triangles.

Of course, there is no need to actually use bisquick if you don't want to.  You can make it yourself, or use the "heart healthy" version.  I even found a whole wheat bisquick recipe the other day that I'll try when I'm out of what I have in my cupboard.  If anyone beats me to it, I'd love a review!

Sunday, July 11, 2010

Waterspots in my Sand

I am a Craigslist queen.  I don't pay full price for anything, but when we realized that our dining room set had the potential to seat twelve, but only 8 seats (combo of benches & chairs) I was seriously considering paying the Amish to copy the chairs we already had.  Then, out of nowhere, just as we were about to close on our house, the Craigslist fairy provided and I found a set of 5 almost identical chairs, which came with a table with two leaves, for under $100.  So my dining set was more than complete, but i had an extra table.  This table has been everything.  It is sometimes a circle, sometimes an oval, sometimes the workspace in my work-in-progress basement kitchen and sometimes a picnic table in our sapling of an orchard. 

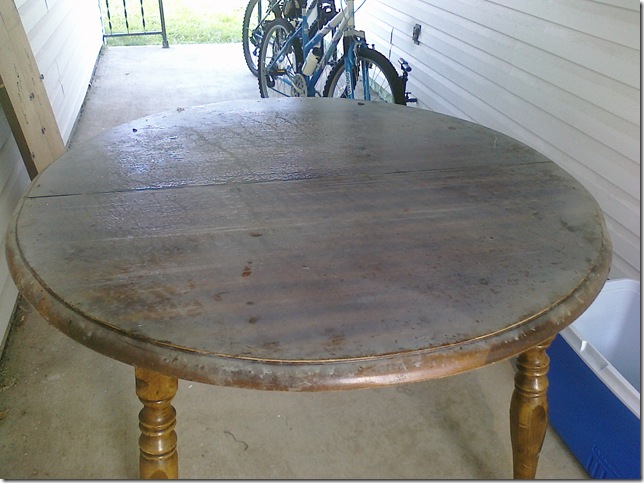
Last weekend, it was a s'more-prep table by our fire pit.  But it was getting dark when our guests left, and we're seriously lazy sometimes, and we left the obviously-meant-for-indoors table outside all night.  Then two.  And then all week, afterall, it was dry right? Well, apparently it hadn't been so dry on Thursday night and this is what we found at 6am Friday morning (aka: t-minus 24 hrs till vacation departure):

CIMG0038

The entire surface was a (thankfully still wet: read, tacky) waterspot!  I was instantly devastated.  I think everyone needs an all purpose table, and now mine was at best going to be doomed to wear a tablecloth for the remainder of its existence, and at worst going to end up as the tabletop for my new outdoor tree-table, after having been stripped and outdoor-ized.  Instantly, I hit the Internet  (it's my way). 

I learned a lot about table finishes, but the #1 tip for ridding yourself of waterspots was mayonnaise.  When a table gets wet, the oils in the varnish (which is what makes it clear, as opposed to filmy) escape, and if they are not replenished before it dries, the filminess stays (and is considerably more difficult to deal with).  Only one little problem, I was out of mayo.  I was going to the store on my way home from work and it was on the list, but all night was going to have to be car packing time, and besides, the table probably would have dried by the time i got home with it.  I decided that my allergen-reducing pledge was probably oil based and definitely made for furniture, so i, without touching the gooey varnish, covered it in copious ammounts of pledge, crossed my fingers, begged God to have mercy on my table, and left for work.  I came home to this:

CIMG0040

Definitely not exactly as it had been before, but DARN close and no nasty filmy stuff.  And so, i could leave for the beach in peace.  :)

Wednesday, July 7, 2010

The Zucchini Diaries: pt. 2

Sorry about the picture quality, my good camera is being charged then packed for the beach! (Only 2 more Days!)

PRESERVATION

Zucchini cans quite poorly, and to be honest, it doesn't freeze incredibly well either.  There are, however, a couple ways to make freezing a little better. 

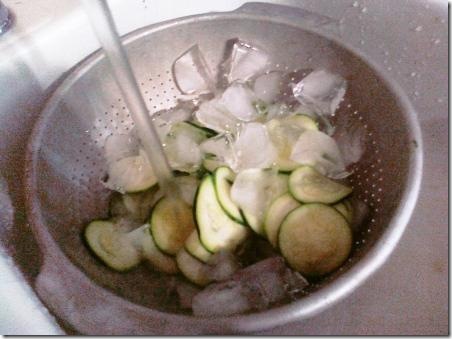
For every-day use, like tossing disks into pasta, slicing them into your favorite shape then blanching helps keep them from getting too mushy.  Cool immediately to arrest cooking, pat dry & freeze in serving-sized containers, as they will still loose some liquid when thawing so you only want to do so once. 


CIMG0031_web

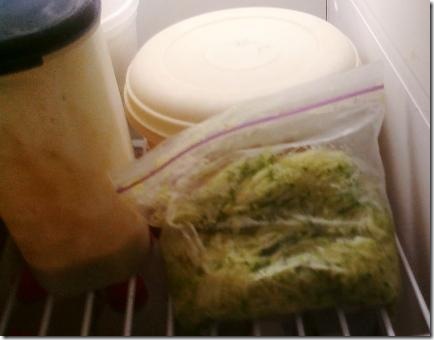
Since mushiness really isn't a concern for zucchini bread, just shred, measure into whatever amount your recipe calls for, and freeze! You'll need to drain it a little when you thaw it. 


CIMG0030_web

ZUCCHINI BREAD

This is just my take on it, but no matter what your recipe, it gets rid of the zucchini!

3 c. White Whole Wheat Flour
1 tsp. baking soda
1 tsp. salt
3 tsp. cinnamon
1/2 tsp. baking powder
1 c. Finely chopped walnuts
3 eggs
1 c. Unsweetened applesauce
1 1/2 c. Honey (or 2c. of sugar or whatever your preferred sweetening agent is)
2 c. shredded zucchini
3 tsp. vanilla

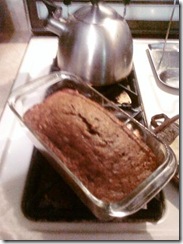
Mix, Grease & bake for 1 hr @ 350.  Makes 2 regular sized loaf-pans worth. 

CIMG0033_web


ZUCCHINI PIE

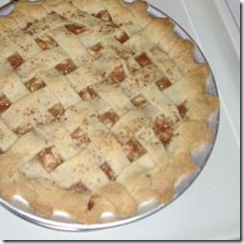
I haven't made this one yet this year, but its a favorite!  Tastes just like apple pie. 

  • 1 recipe pastry for a 9 inch double crust pie
  • 2 large zucchini
  • 2 tablespoons lemon juice
  • 1 pinch salt
  • 1 1/4 cups packed brown sugar
  • 1 1/2 teaspoons ground cinnamon or your favorite apple pie spices
  • 1 1/2 teaspoons cream of tartar
  • 1 pinch ground nutmeg
  • 3 tablespoons all-purpose flour
Directions
  1. Peel the zucchini. Cut into halves lengthwise, then remove seeds and cut crosswise (as you would cut apples for apple pie). Toss together 4 cups chopped zucchini, lemon juice and salt. Place mixture into frying pan and cook until tender-crisp.
  2. In a separate bowl, mix together the brown sugar, cinnamon, cream of tartar, nutmeg and flour. Add the cooked zucchini to sugar mixture and mix well. It will be a little runny, but that's OK.
  3. Place filling into a 9 inch pie crust, dot with butter, and place top crust on. Make sure you slit it, or this pie also works well with a lattice top.  Bake in oven at 400 degrees F for 40 minutes or until golden brown

104443

Tuesday, July 6, 2010

The Zucchini Diaries: pt. 1

You'll be hearing a lot from me in the coming weeks about zucchini, mostly cuz i'll be swimming in it.  Here are some of my recipes to use it all up!

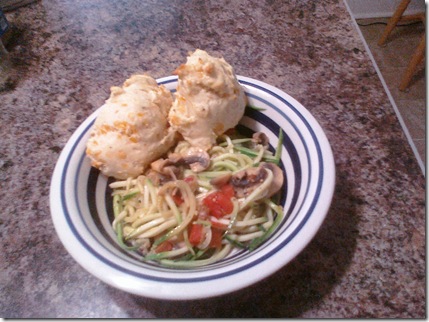
ZUCCHINI SPAGHETTI

CIMG0029

Yields: 4 servings

4 Roma Tomatoes, diced
3 Finely julienned zucchinis
1 medium Sliced Onion
2 cloves minced garlic
Mushrooms to taste
Italian Seasoning
Olive Oil
White Wine

Heat the oil, add garlic, tomatoes, onions, mushrooms & seasoning.  Halfway through cooking add some white wine.  Once wine has cooked down some & sauce has thickened, add zucchini (blanche first if you don't like it a little al dente) and toss and cook 'til it's how you like it. 


ZUCCHINI BOATS

Yields: 6 servings

3 Zucchinis, halved length-wise, seeds removed
1lb Italian Sausage
1 medium onion, diced
3 Sweet (or spicy if that's your thing) Banana Peppers, halved length-wise, seeds removed & sliced
             (I didn't have that many ripe yet so i diced some snow peas and it turned out nicely)
2 cloves minced garlic
1 can organic tomato paste
Water/White Wine
Shredded or Grated Cheese (Optional)

Blanche zucchini & set aside.  Brown sausage, drain if necessary.  Add Onion, Peppers & garlic to sausage
& sautée.  Once vegetables are cooked through, add tomato paste & add water and/or wine until it's the consistency of sloppy joes.  Stuff the boats & bake @ 300for 30 minutes or until zucchini is cooked through.  Top with cheese and serve. 

Dave (er..uh, Nick) and the Giant Pickle

As mentioned in my last post, Pickles aren't exactly my thing.  As a matter of fact, I whole heartedly agree with the T-shirt slogan "Pickles are cucumbers soaked in evil".  This probably stems from my dislike for vinegar


shirt

It has been unseasonably warm and dry around here.  It's southwest PA, our summers are supposed to me mid-80's, humid and rainy... not almost a hundred and, while still humid, no rain in sight.  My poor grass is all shriveled.  So is our garden, not that it's stopped the zucchini.  Last night we decided it was high time we watered (from the rain barrel) the poor parched plants after we picked them (only the third time this year).  This afternoon (less than 24 hrs later) we have cucumbers the size of Texas!


I Rest My Case. 

Monday, July 5, 2010

Pickles

In my infinite wisdom, I gave my hubby the go-ahead last fall to increase the size of our garden (and by increase, i mean quadruple) .  His first order of business? 14 Pickling Cucumber plants.  Now, I don't care for pickles... or anything with vinegar in it for that matter, but let me tell you what, thats a lot of cucumbers.  So here are a few of my escapades:

Refrigerator Sweet & Spicy Dill Pickles
  • 12 3 to 4 inch long pickling cucumbers
  • 2 cups water
  • 1 3/4 cups white vinegar
  • 1 1/2 cups chopped fresh dill weed
  • 1/2 cup white sugar
  • 8 cloves garlic, chopped
  • 1 1/2 tablespoons coarse salt
  • 1 tablespoon pickling spice
  • 1 1/2 teaspoons dill seed
  • 1/2 teaspoon red pepper flakes, or to taste
  • 4 sprigs fresh dill weed
    Directions

  1. In a large bowl, combine the cucumbers, water, vinegar, chopped dill, sugar, garlic, salt, pickling spice, dill seed, and red pepper flakes. Stir, and let stand at room temperature for 2 hours, until the sugar and salt dissolve.
  2. Remove the cucumbers to three 1 1/2 pint wide mouth jars, placing 4 cucumbers into each jar. Ladle in the liquid from the bowl to cover. Place a sprig of fresh dill into each jar, and seal with lids. Refrigerate for 10 days before eating. Use within 1 month.

I doubled it with just our first week's worth of pickles, but i think they turned out quite well.
Refrigerator Pickles