beauty of a chandelier, complete with a full tutorial on the designer's site. I was in love. A mason jar light fixture? B-b-b-but all of my every-day glasses are mason jars and I can and...this is just too perfect. In the morning, I showed it to Nick who, in his infinite wisdom, pointed out that while the CONCEPT was indeed "so me", he couldn't envision me having such a hap-hazard light fixture. He was right, I'm way too type A for this, but I was not ready to give up that easily.
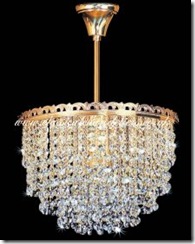
This is my second piece of inspiration: a waterfall chandelier. I had a vision in my head and a game plan (watch out).
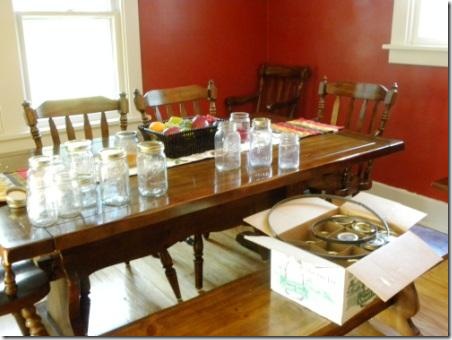
I went in the basement and gathered my jars.
Some of which were cool and old (but not blue, those'd look bad in my diningroom)
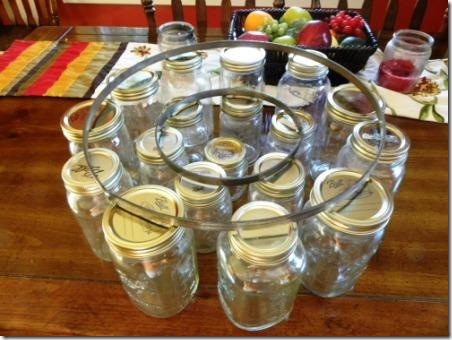
Then I lined them up in concentric circles,
measured them,
and had Nick have the machine shop (or is it the tank shop?) at work make me some steel rings. The big one would eventually have a cross in the middle, and the small one four holes.
Then, as per the tutorial, I drilled holes in the lids and wired the bulbs. Instead of having each bulb wired separately, the two tiers were wired in paralell and only the one, center jar was wired exactly like the tutorial. I used wire & black zip ties with washers to attach the jars to their rings. The big ring was suspended by the center of it's t and the small ring was suspended by chains. I used the base from the original chandelier in the house (whose wiring mysteriously gave out right before I started this) to attach it to the ceiling.
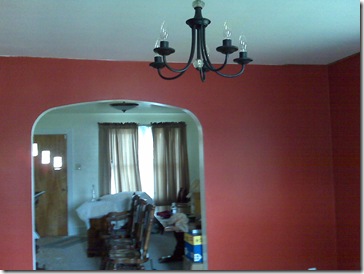
So, my diningroom when we bought the house:
That chandelier didn't last long (half of the globes were broken anyways) so we removed them and painted it (this was obviously still while we were moving):
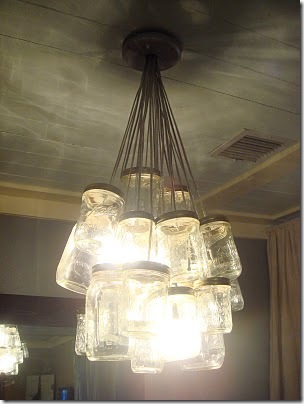
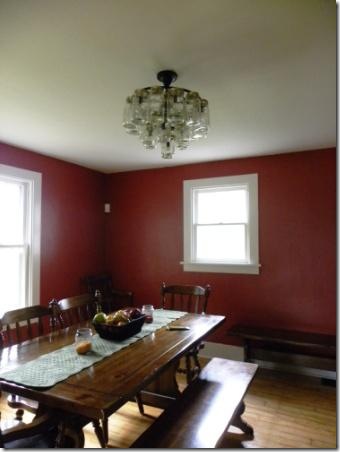
AND Introducing my new chandelier:
Doesn't it do cool things to the ceiling?
UPDATE
This chandelier has been featured on Kara Paslay Designs and Love and Trash. Make sure to give these ladies some love!




Whoa! That turned out awesomely :-)
ReplyDeleteLooks fabulous! I wish canning jars were cheaper here in NZ. New, you are looking at $5-7 a pop. Ugh!
ReplyDeletelove this. do you know where i could find metal circles like this premade?
ReplyDeleteMaybe if you did some junkyard digging you could. They sell large metal rings for dreamcatcher making and large wooden rings for quilt embroidery. This chandelier is actually so heavy (thanks to the glasses) that my husband could hardly lift it with two hands and I actually consulted my engineer brother about whether or not he thought the ceiling joist could handle it. As such, I didn't think the wood of the embroidery circles would be strong enough, nor would the wire they use to make the dreamcatcher circles. What I had made was really a combo of the two. Metal, like the dreamcatcher, but made out of bands, like the embroidery circle, for more structure. There isn't a picture of it cuz at one point I got so engrossed in my project i forgot to take pics, but the large circle eventually had a cross welded in it and the smaller one had 4 equally spaced holes drilled in it. The idea was that the cross would help me suspend the larger circle from its center, without making it farther from the ceiling than it needed to be. It did work, but it assumed that each jar weighed exactly the same and would be spaced exactly evenly. This wasn't apparently the case and i had to spend some time lashing ballast in hidden places to level it. Suspending the second circle by chains made it self-level, all I had to do was count the links on each chain. That worked out much better and if you're planning to hang it in a higher ceilinged room, i would recommend you use the chain method for both.
ReplyDeleteAll that being said, I had them made because I couldn't find anything that I thought would work. If you know a machine shop around there you could talk to, i'm sure they could make the for you. Or if you happen to have the pleasure of living in Western PA (or even not) I can recommend a machine shop that could do it. If you're serious about it, I can even comission the pieces for you and put them on my etsy shop.
Lovely work. I posted about it here:
ReplyDeletehttp://loveandtrash.com/2011/01/diy-mason-jar-chandelier/
Thanks so much for sharing, and for the inspiration!
Going to do this for my house...and the old green jars will be perfect for me! I will let you know when I get it done! XOXOX
ReplyDeleteI look forward to seeing it!
ReplyDeleteWhat did you do with your old chandelier, can I have it? lol You could have just screwed mason jars over the candles, that is what I want to do. Not so labor intensive, but yours is definitely awesome!!!! :) Jennifer Freels jennifer@ice-us.com
ReplyDeleteThe old chandelier was original to the 1930's house, and the wiring went just days before i was about to replace it. Also, I used the old base so there's not much salvageable. Finally, the old chandelier was sized inapropriately to the room and I didn't care for the look of just turning jars on top of it.
ReplyDelete